In search of the quick fixes to the QuickBooks error code 15240? If yes, then the search ends over here. The QuickBooks error code 15240 is an update error that can annoy the user when updating the QuickBooks desktop and also at the time of updating the payroll software. The user can face such an error when there is any sort of misconfiguration with the internet explorer settings, time, and date settings. Such an error appears on the screen with the following error messages:
- QuickBooks error 15240: HRESULT XXXXX the QuickBooks update did not complete successfully
- QuickBooks error 15240: HRESULT XXXXX the payroll update did not complete successfully
To find out the right steps to fix the QuickBooks error 15240, make sure to read this article till the end. However, if the user wants professional assistance, then get in touch with our QuickBooks support team. Our QuickBooks support team will ensure to provide the user with the best solutions available.
What Causes QuickBooks Error Code 15240?
This error can be seen due to the factors that we have tried to list in this article. Let us have a look:
- The user can end up in such an error if the user isn’t using the latest version of QuickBooks
- Another reason can be if there is a damaged QuickBooks update
- One can end up in such an error if the download link that has been specified is wrong, incorrect, or invalid but the shared download is active
- Also, if the user has logged in as a windows admin or the user isn’t running the application with admin credentials, then such an error can be seen
Methods to Perform to Fix QuickBooks Error Code 15240
The user can perform the below-stated steps to fix the QuickBooks error code 15240. Let us have a look:
Method 1: Use the Clean Install Tool
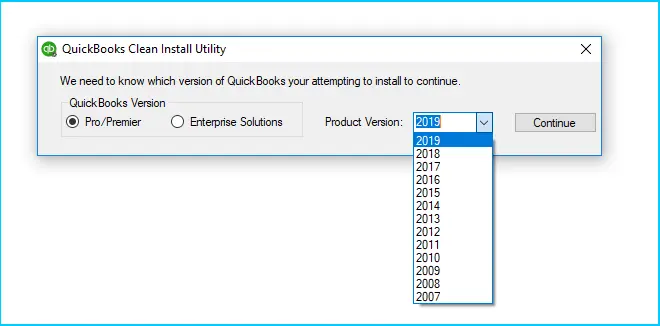
- Uninstalling QuickBooks
- The user should first press Windows + R to open a run window
- And then, type appwiz.cpl and also click on the ok tab
- Now, under the programs and features tab, the user should select QuickBooks and click on uninstall option
- The next step is to click on yes
- Hit next and select remove
- This might take some time to uninstall QuickBooks from the system
- After the install wizard is uninstalled in QuickBooks, then click on the finish tab
- Run clean install tool
- In this process, the user should download and install the QuickBooks tools hub
- After that, double click QuickBooks tool hub
- And click on yes
- After the tool hub opens up, the user should click on install issues
- Moving ahead, the user should click on the clean install tool
- And then select the QuickBooks version and product version
- The last step is to click on the continue tab
Read Also:
How to Install Multiple QuickBooks Desktop Versions on One Computer?
Method 2: Verifying the Internet Explorer Settings
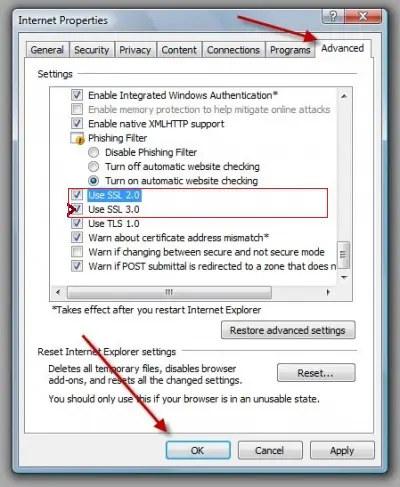
- The user should first press Windows + R to open run
- After that type INETCPL.CPL and click on the ok tab
- Move to the advanced tab and also under the security section, the user should ensure to check SSL 3.0
Method 3: Verify Firewall Settings
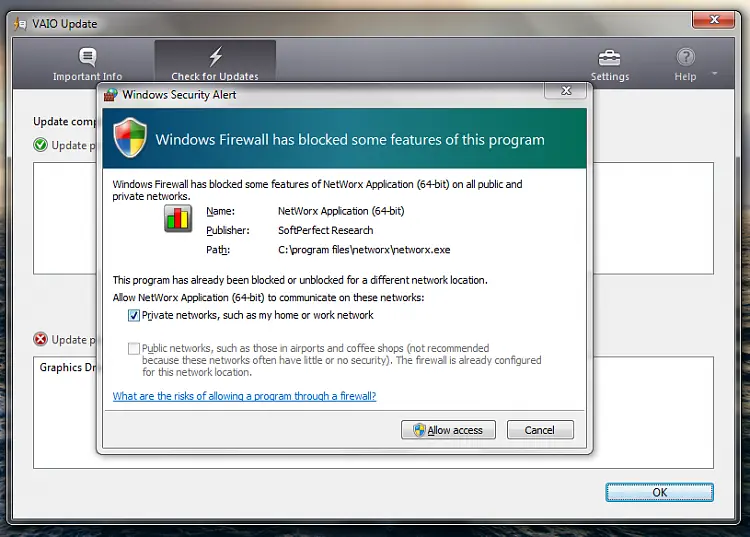
In case the user is making use of the third-party firewall in the system for security reasons, then the user should ensure that the below files have full access.
- Qbw32.exe
- Qbupdate.exe
The user might have to contact the firewall customer support, which might help in checking about the above files.
Method 4: Run QuickBooks as an Admin
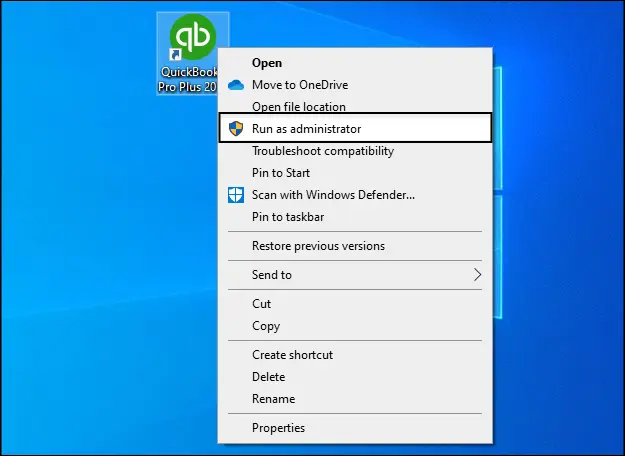
- This process requires the user to close the QuickBooks desktop
- After that right click on QuickBooks
- The next step is to choose to run as an admin
- The user should click on yes to allow the user permissions
- And you are good to go
Method 5: Verify the Date and Time Settings
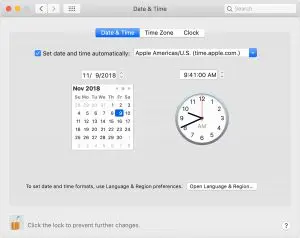
- The user should now press windows + R to open run
- Also, type in the control panel and click on the ok tab
- The user will then have to click on clock and region and also date and time
- After that click on change date and time
- The user should now enable the changes and also click on the ok tab
Method 6: Permit the Windows Permissions to QuickBooks Folders
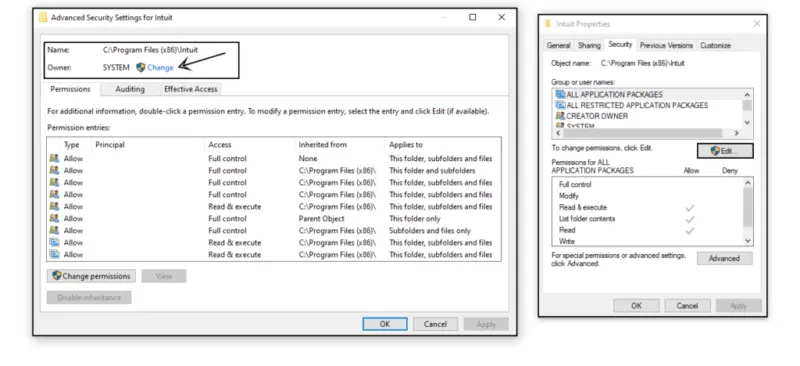
- In this step, the user should close QuickBooks
- After that move to C:\Program Files
- Also, look for intuit folder and right-click on the same
- The user should now select properties
- Go for the security tab and also choose advanced
- The user will have to make sure that the owner of the folder is the user group
- Else the user can take ownership of intuit folder
- The user will have to click on change next to the owner
- After that enter the user under the object name to choose and click on check names
- Once done with that, the user should click on the ok tab
- Also, check on replacing owner on sub containers and objects
- Now, click on apply and ok tab
- After that, the user will be back on the intuit properties and then click on the edit tab
- Choose the user group and check full control
- The last step is to click on the apply and ok tab and you are good to go
This drives us to the end of the article, where we hope that the information shared in above might help in successfully fixing the QuickBooks error code 15240. If in case the error persists, or if the user needs any of our assistance, then he/she can get in touch with our QuickBooks support team, and our QuickBooks experts will provide the user with immediate tech assistance.


