Looking for a comprehensive guide to installing QuickBooks desktop on a terminal server? Well, your search ends over here, today’s article is entirely based on the step-by-step process to install a QuickBooks desktop on a terminal server. The terminal server setup permits the applications to be installed on the central server. This central server has other systems linked to it, and also, they access the applications of the terminal server. The best part is that the software is not installed on the hard drive of individual systems. On the terminal server, multiple users can access the company file on a remote system in QuickBooks. Below we have discussed the step-by-step procedure to install QuickBooks desktop on a terminal server. Thus, make sure to scroll through the post carefully. However, if you think the process would be too technical for you, then make sure to consult professionals, instead of risking your essential data. You can get in touch with our QuickBooks support team and ask them to carry out the process on your behalf. All you have to do is to give us a call at our toll-free customer support number and leave the rest to our team.
Important
It should be noted that phone support is provided for QuickBooks desktop enterprise solutions only, but the following system-related issues are not supported:
- Setting up, configuring, or enabling terminal services
- Enabling clients to connect to the server
- User permission issues for server connections
- Issues with terminal server connections
- Latency and slow performance issues
System Requirements for QuickBooks Terminal Server Installation
The user needs to keep a check on the system requirements, before moving ahead.
- Operating system
- Windows 10, all editions including 64-bit natively installed
- Microsoft Windows 8.1, all editions including 64-bit, natively installed
- Windows 7 SP1, all editions including 64-bit, natively installed
- Microsoft Windows Server 2016
- Windows Server 2012 R2
- Microsoft Windows Server 2011
- Windows Server 2008 R2 SP1
- Internet Explorer
- 5GB of disk space
- QuickBooks Pro 2019, premier 2019, and enterprise 19.0 with the following firewall and antivirus programs
- Windows server firewall (all editions)
- Microsoft Windows 8.1 firewall (all editions)
- Windows 7 firewall (all editions)
- Microsoft security essentials
- Avast
- AVG
- Symantec
- ESET
- Avira
- Kaspersky
- McAfee
- Bitdefender
- Malwarebytes
Steps to Install QuickBooks Desktop on a Terminal Server
Here are the detailed steps to install QuickBooks desktop on a terminal server. This can be done by carrying out the steps below:
- The user will have to log in to the server where you have to install QuickBooks desktop on a terminal server
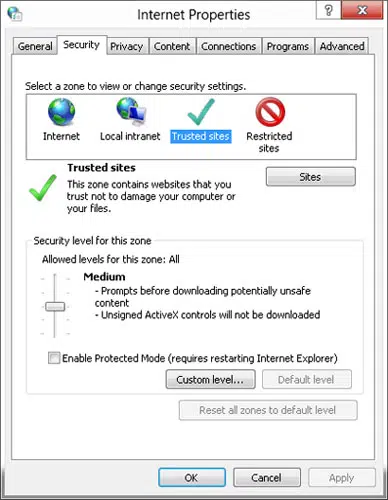
- And then change the IE security to the medium by:
- First of all, move to the control panel from the start menu and then choose admin tools
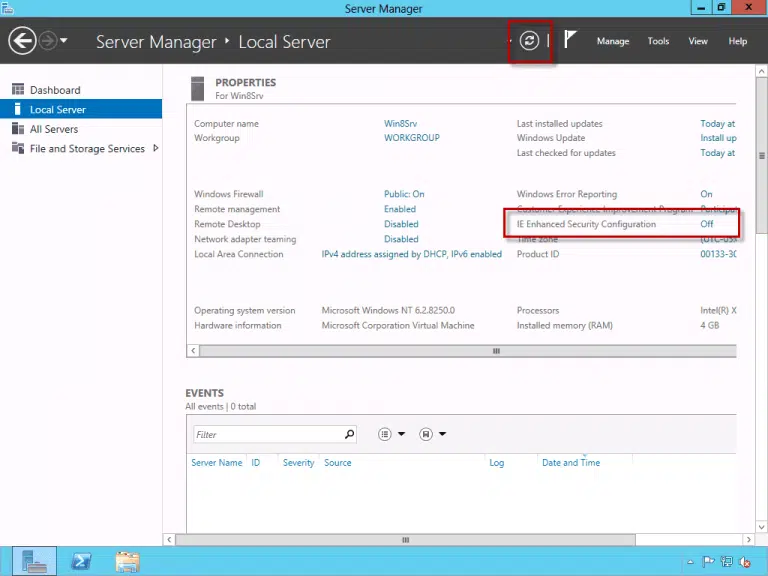
- Now, under the security information section in server manager and then click on configure IE ESC
- Also, turn the status to OFF and then hit ok
- The last step is to finally turn off the windows firewall
3. After that, the user needs to activate the terminal server
- This can be done by selecting roles in the server manager and then moving to add roles and hitting next
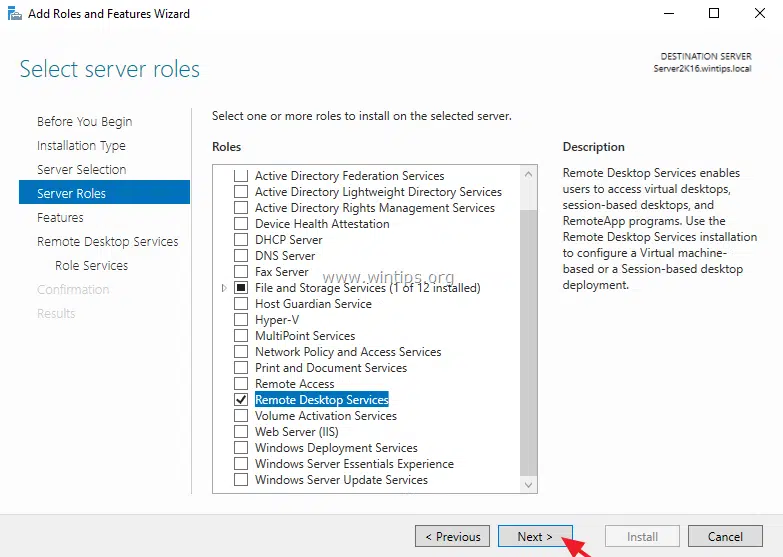
- Also, tick the box terminal services and then follow the onscreen prompts
4. Now, install QuickBooks desktop on the terminal server
- For this, the user needs to close all running applications
- And then, press windows + R to open run
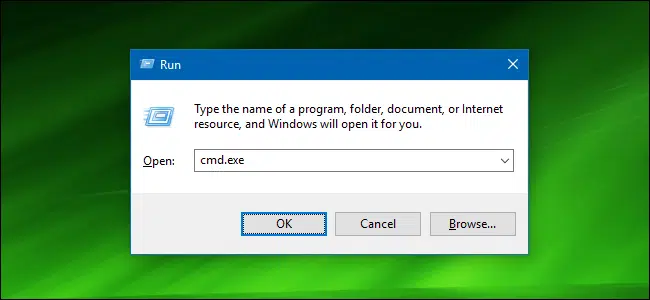
- c. Also, type CMD and hit ok, in order to open the command prompt
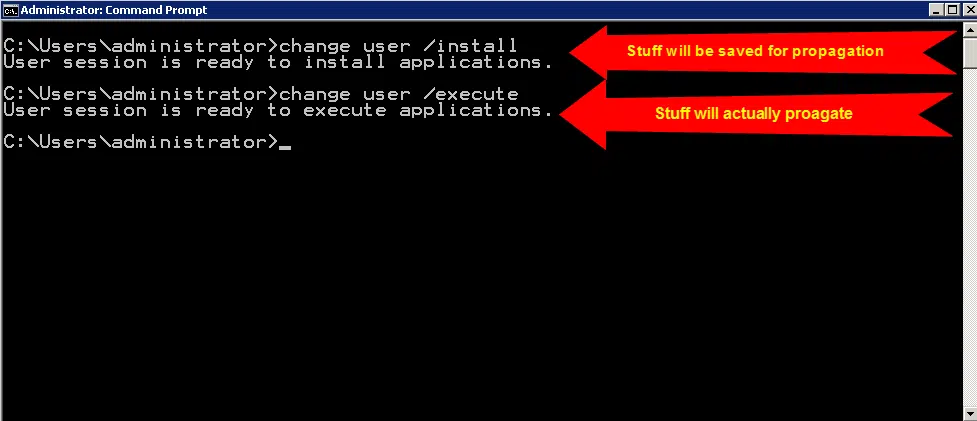
- The next step is to change the user mode and then type change user/ install and hit enter
- Now, download and install QuickBooks desktop
- And also reopen the command prompt
- The next step is to type change user/execute to change the execute mode and then hit enter
Additional Steps to Import QuickBooks Terminal Server Permission
- The additional steps involved in the process is to ensure that all QuickBooks users are given full control permissions to the QuickBooks data folders
- And then give QuickBooks users full control permissions to the intuit keys present in the registry
- After that click on the windows start tab in the search box and then type Regedit
- And also, select regedit32.exe to open the registry editor box
- The next step is to create a backup of the registry
- And then click on HKEY_LOCAL_MACHINE and then move to software. And then from intuit select the option QuickBooks registration
- Now, then you have to highlight the version of QuickBooks and also right-click to select permissions
- Lastly, give full control to QuickBooks uses
Conclusion!
We believe that the above steps would successfully help you in installing the QuickBooks desktop on a terminal server. On a terminal server, the QuickBooks program and database manager are quick and easy. However, if you are unable to accomplish the desired results after carrying out the steps above, then it is recommended to consult a professional or technical team who will help you in making the best of it. You can get in touch with our team of experts and certified professionals, and we will help you out in fixing the error. Give us a call at our helpline number, and leave the rest to our professionals.
